Device Types’ allow fast creation of process control procedures which enables the ‘Auxiliary Reading’ function and utilises a certificate template with graphing capabilities.
With pressure and temperature calibration it is not always possible to set the exact required input value. To assist with this during a calibration run EasyCal can adjust the required value ‘real time’, meaning the user does not require precise setting of the input value. EasyCal takes readings from two different calibration instruments simultaneously. The functions for input and output can also be different.
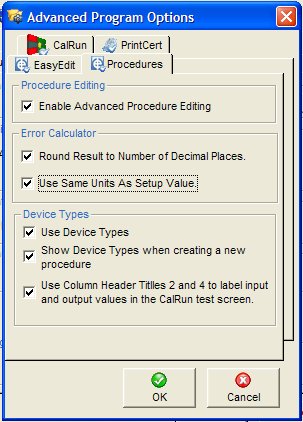
To enable ‘Device Types’ go to EasyEdit > System Setup > Options > General Options > Advanced Program Options > Device Types. Tick all three boxes.
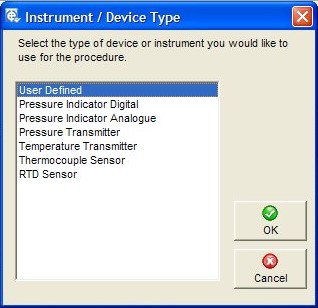
To use device types select ‘procedures’ and click ‘new’. When creating a new procedure the user is presented with a ‘Device Type’ selection window.
Input & Output Ranges
For devices with different input and output functions, such as pressure and temperature transmitters the input and output range settings will be present. When the wizard creates a series of tests these values are used to scale the required inputs relative to the outputs.
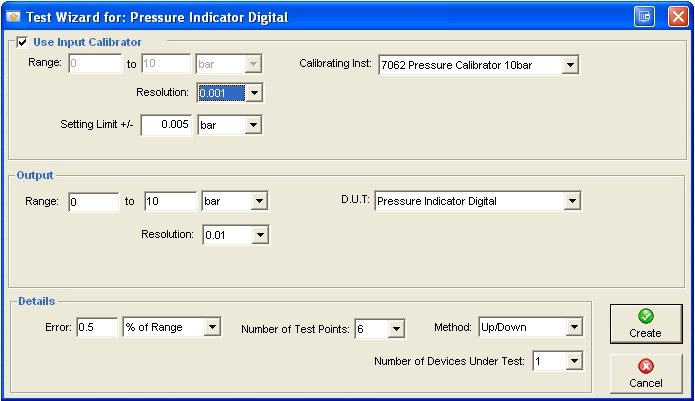
If the device type input and output share the same function, such as a pressure or temperature indicator, the input and output settings are the same. Therefore there is only one selection made ‘input/output’.
To create procedures in the normal way select ‘User Defined’. Otherwise select the device type you wish to create a procedure for.
Certificate Columns Titles and Type
If calibrating a pressure or temperature transmitter the ‘Aux (Input) Value’ column title will be present.
Once the details are entered the next step is to create the procedure.
Procedure Wizard
If the device type supports the procedure wizard the ‘Wizard’ button will be enabled on the toolbar. The procedure wizard automatically creates a set of tests based on the criteria entered.

Click ‘Wizard’ in the Test Details window.
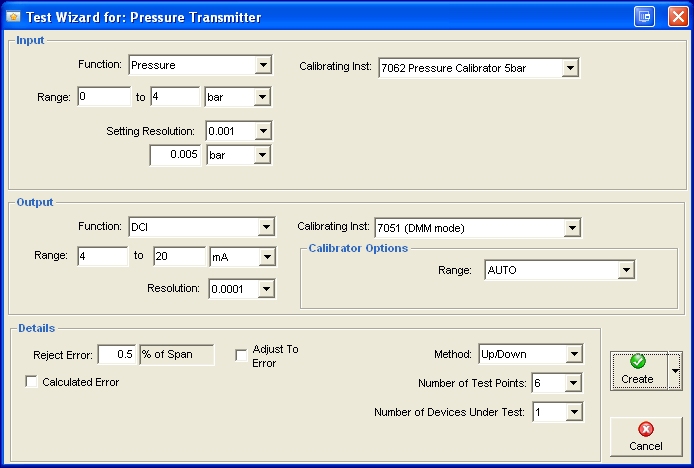
For devices with different input and output functions, such as pressure and temperature transmitters, the input and output details are shown.
Input
Range
The procedure will create tests based on this range. The input settings will apply to the ‘Auxiliary Reading’ parameters explained later in this chapter.
Setting Resolution
This is the precision of the input calibrator setting. This also determines the number of decimal places shown on the certificate for the ‘input’ values.
Setting Limit
This is used to assist user to obtain an input value close to the actual test point.
Calibrating Inst
This is the calibration instrument used to provide the input. When using Time Electronics calibration equipment with PC communication enabled the input value will be read back automatically during the calibration run.
If using a 3rd party calibration instrument without PC communication the input value will be entered via keyboard.
If a 3rd party calibration instrument which has a ‘readback’ driver associated with it, the wizard will use the communication settings as defined in the ‘readback’ driver section. These can be changed in the ‘Auxiliary Reading’ parameters on a test by test basis if required.
Output
Range
The initial values are set as in the procedure details. The output settings are applied to the main parameters of the test.
Resolution
This is the resolution of the device under test. This also determines the number of decimal places shown on the certificate for the ‘output’ values.
Calibrating Inst
This is the calibrating instrument used to measure the output value. Depending on the type of calibrating instrument, options may be available.
When using Time Electronics calibration equipment with PC communication enabled (for example a 5051 or 7051 DMM) the output value will be read back automatically during the calibration run.
Details
Reject Error
This is where the accuracy of the device under test is entered. It is possible to edit this information on a test by test basis.
Adjust to Error
This information is only shown on the header of the certificate.
Number of Test Points
This is the number of tests required. The wizard will produce a series of tests based on the input range and the number of tests selected. A 6 point procedure will produce tests at 0%, 20%, 40%, 60%, 80% and 100%.
Method
This applies to the number of tests produced. ‘Up’ will produce a series of ascending tests 0% to 100%.
‘Up/Down’ will produce a series of tests 0% up to 100% and back down to 0%. There is also the option to add an over range test of 105% to ‘Up/Down’ tests.
Number of Devices Under Test
If testing a batch of devices, this will repeat each test for the number of devices selected.
Use Input Calibrator
When the input and output functions are the same, for example a digital pressure gauge, the option to use an input calibrator is available.
The D.U.T, Device Under Test, output (or reading) is will now be entered via keyboard.
Test Details
Once the information is reviewed click ‘Create’. This will delete all existing test and create a new set of tests.
(It is possible to append to existing tests by clicking on the drop down menu from the create button).
The wizard automatically creates the test name, function and test value. It sets the allowed error (based on the error value entered in the wizard) and creates a test prompt to assist the user. The auto proceed function is also selected.
Each test can be viewed and edited individually, or batch edits performed by selecting any number of tests and clicking the edit button.
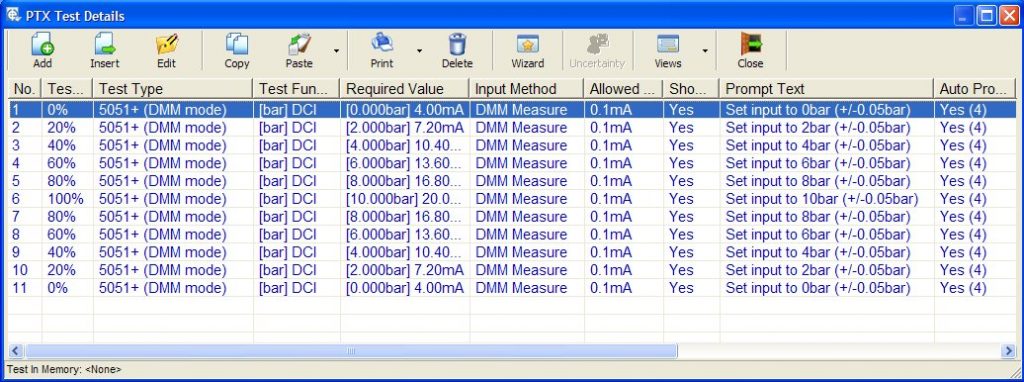
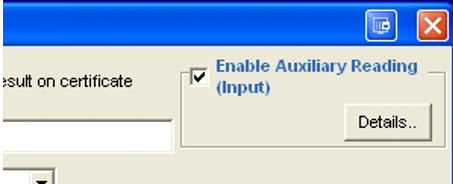
If using a device type with input and output functions the ‘Auxiliary Reading’ feature is enabled. In the test list the auxiliary function and value is show in square brackets for example [4.000bar].
To edit the details for an Auxiliary Reading, click the details button.
Auxiliary Reading
This sets the parameters for the ‘input’ calibrator.

Calibrating Instrument
Select the input calibrator to use.
Function
The input calibrator function
Input Method
For some calibrating instruments this is fixed. If the instruments supports ‘readback’ the readback option will be available, keyboard entry is also available for instruments which do not.
Nominal Value
This is the required value for the auxiliary input function.
Setting Limits
This is used to assist user to obtain an input value close to the actual test point.
Adjust Required Value
The main required value can be adjusted using the auxiliary reading during a calibration run.
N/A: No adjustment will apply
Scale The Value Using Range: The main reading will be adjusted by the auxiliary reading using both the auxiliary input range and the main output D.U.T Range. For example; the input is 0-10bar the output is 4-20mA. If the input is adjusted to 4.1bar the equivalent output will be 10.74mA.
To the % Error of Auxiliary Value: The input error from the nominal will be used to adjust the main reading during calibration run. Remember if either nominal are zero the adjustment will not occur.
To Equal The Auxiliary Value: This is only available if the units for the main reading and auxiliary reading are the same.
Scale Settings
This is used if the option to ‘Scale the Value Using Range’ is selected