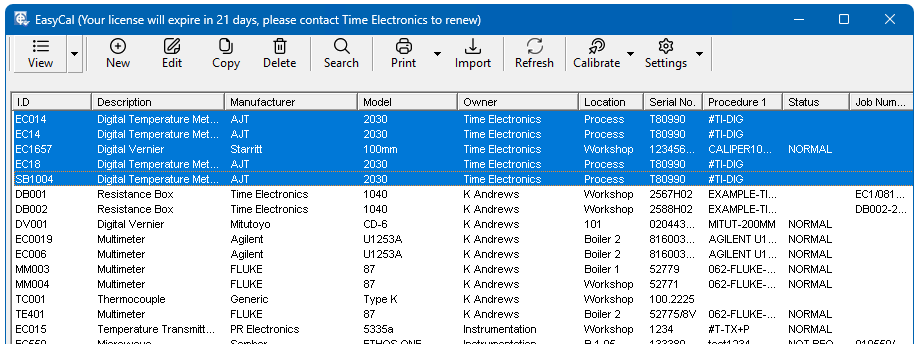
Selecting Instruments from the Main Selection Menu, the program proceeds to the Instrument window as shown below. The individual options are described on the following pages.
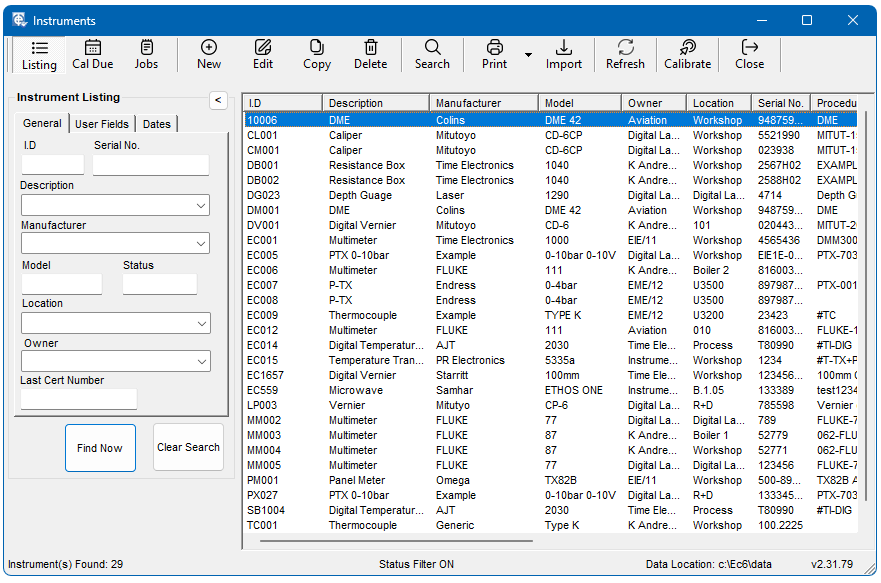
When viewing ‘Instruments’ there are 3 options to choose from:
Listing: provides a full listing of your Instrument Inventory.
Cal Due: shows Instruments due for Calibration.
Jobs: shows a list of Jobs ‘Booked In’.
New
If a new instrument is to be added to the system, the following blank data entry screen is displayed. The field entries are described in the following paragraphs.
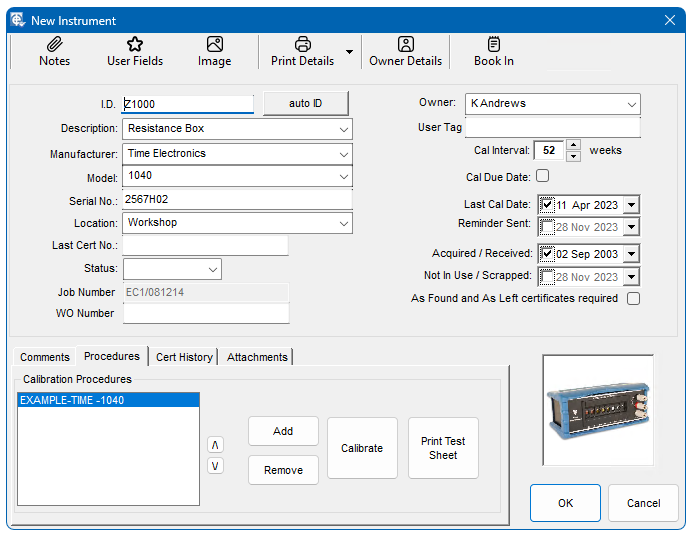
Instrument I.D
When an instrument is added to the database it is necessary to give it a unique identity.
This is a 20-character user definable code (alpha/numeric upper case only). Many users will already have an instrument/equipment identity coding system and in most cases it should be possible to retain the same format. It is important that the Ident code is unique i.e. there are no duplicates. EasyCal uses this field as the main index key for the instrument database. It is recommended practice to omit spaces from the code since these can cause apparent duplication of the same Ident code.
Auto ID
EasyEdit can assign a unique ID code automatically. All Auto ID codes are incremental and prefixed with the letters EC. The number following is left justified with no leading zeroes, for example,
EC1, EC2, EC3…EC10, EC11, EC12 and so on. If the number range is incomplete (as a result of subsequent deletions), the increment will be from the highest number found.
To create fixed length IDs when using this feature, it is recommended that the first instrument be added manually and assigned an ID of EC1001. The AutoID feature may then be used and will increment from 1001 thus providing a range up to EC9999 all of 6 chars length. This ensures that an alphabetic sort on the ID field maintains the numeric sequence.
Type
30-character free form field describing the type of instrument. The drop down list supplies previously used entries and is automatically updated with new entries.
Manufacturer
30-character free form field specifying the manufacturer’s name. The drop down list supplies previously used entries and is automatically updated with new entries.
Model and Serial No
These are both 20-character free form fields.
Location
30-character free form field and is used to specify the physical location of the instrument. The drop down list supplies previously used entries and is automatically updated with new entries
Last Cert No
20-character free form field for recording previous certification reference (if any). EasyCal automatically updates this if CalRun has performed the calibration.
Status
10-character free form field and is used to specify a particular condition for the instrument e.g. Non-operational or scrapped etc. It is used in particular by the ‘CalMan’ software and the user can specify codes for instruments that are not required to be recalled for calibration. The codes are user settable in ‘CalMan’ setup.
Owner
30-character free form field Identifying the owner or customer. The drop down list provides previously used entries and is updated with new entries.
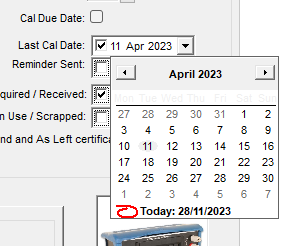
Cal Due Date, Last Cal Date, Date Acquired, Date Scrapped, & Reminder Sent.
Four dates can be associated with the instrument:
‘Last Calibration Date’ – this will be updated automatically by CalRun but prior to re-calibration with EasyCal, alternatively the date can be edited manually.
‘Reminder Sent’ – this will be updated automatically once a reminder letter is printer or alternatively the date can be edited manually
‘Date Acquired’ and ‘Date Scrapped’ – these are input by the user as required.
For each date field, a calendar drop down is available to speed up entry and prevent errors. Month and Year selection is via incrementing buttons.
Calibration Interval and Due Date
By default, the calibration due date is automatically calculated from the last calibration date and calibration interval. If required, this calibration due date can be manually set and this calculated date is overridden. This feature can be used to pull forward or push back a calibration due date. It can also be used to align a number of instrument’s calibration due dates so they are performed in the same period.
The calibration interval is not affected when a manual calibration due date is entered. Once a calibration has been performed using CalRun, the manual calibration due date is removed and reverts to the automatically calculated date.
Before and After Adjustment Required.
If this option is ticked, the user will be prompted at the beginning of a calibration run that before and after adjustment results are required.
Notes
Service Notes
At the end of a calibration run, if required, the date and time is automatically recorded in these fields. The user can then add to this information as required.
General Notes
Any other information relative to the instrument can be entered here.
User Data
The user may select (in ‘System Setup’) to use up to 5, user definable fields for Text (20 char max), Dates, Numbers and Yes/No flags. In System Setup the user is allowed to give each field a name (10 char max). These fields will then appear when the ‘User Data’ button is clicked. Only the fields, which have been given names in System Setup, will appear in User Data.
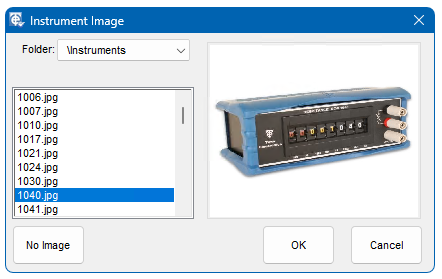
Image
The image selected will appear in CalRun for recognition. If no image is required, click ‘No Image”. All images are stored in the EC6\Pics directory, and any new images must be imported into that folder to make them available. File formats of jpg and bmp are supported.
Print Details
Individual details for an instrument can be printed. This report shows all the relevant information for the selected instrument.
Print ID Label
A label showing the ID number and ID number as a barcode is printed for the selected instrument.
For examples of instrument reports see the print-outs section in this manual
Owner Details
Additional details are included by clicking on the ‘Owner Details’ button.
Book In / Job Details
This is explained fully in the Job Management section of this chapter.
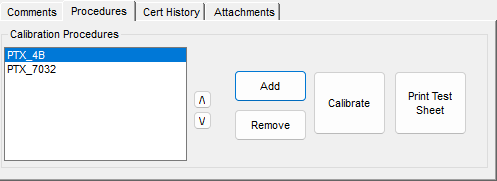
Procedures
The calibration procedure(s) that are used to calibrate the instrument are entered into the list at the bottom left corner of the instrument screen. Unless a procedure is entered here it will not be possible to calibrate the instrument.
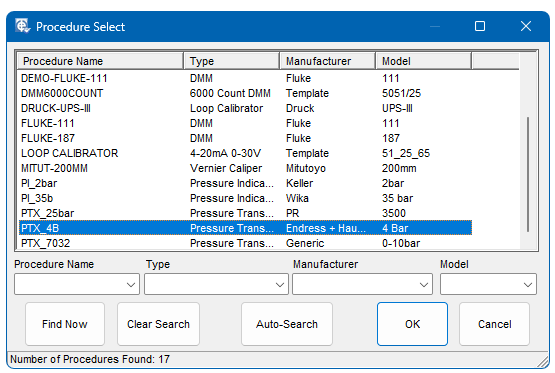
The ‘Add’ button will bring up the list of procedures that are on the system. A search facility is provided to simplify the location of the correct procedure.
An intelligent Auto-Search is also available which attempts to match the information on the instrument record with that on the procedure record i.e. looking to match Manufacturers and Model number. If required, more than one procedure can be attached to an instrument. This allows the same instrument to be calibrated to different specifications if required. In most cases only one procedure per instrument will be required.
Print Test Sheet
This produces a test sheet used for written entry of data.
Calibrate Now
To calibrate the instrument without exiting EasyEdit, click the Calibrate Now button. This will start up CalRun with the selected procedure and instrument data.
Comments
The user can also input 4 lines of general comments about the instrument. These will then be printed on the Calibration Certificate. (4 lines x 80 char max).
Cert History
Provides a list of certificates issued for the selected instrument. These can be EasyCal generated certificates, or attachments.
Attachments

Various documents can be attached to an instrument. If the document is a certificate and you wish to show this in the instrument’s certificate history select ‘certificate’ as the type. Extra information will appear including the certificate number, calibration date and calibrated by.
Edit
If an existing instrument is being edited, the user will need to select it from the list of instruments already on the system. When the required instrument record has been located in the list, the entry is highlighted and the Edit button is clicked to display the instrument information is shown.
The fields displayed are identical to those described in the previous section in relation to adding a new instrument. All the fields have the same constraints in terms of field lengths and available drop down lists.
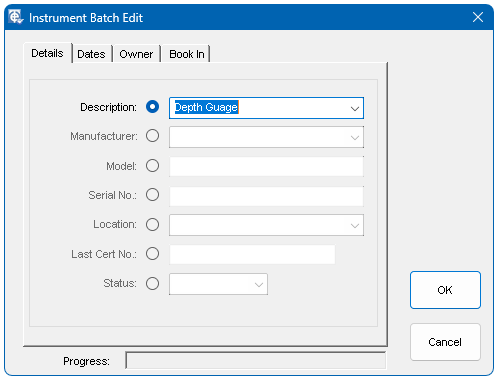
Instrument Batch Edit
To edit information for more than one instrument, select the required instruments from the list using the shift or control key.
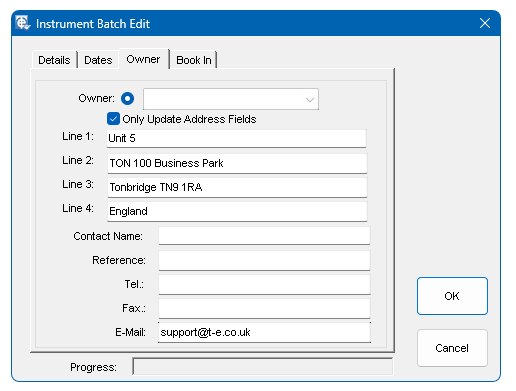
The Instrument Batch Edit window has a series of tabs containing fields which can be edited. The information in the Details and Dates tabs can only be edited individually. All fields in the Owner and Book-In tabs can be edited.
If required, the owner address can be updated for the selected instruments without having to update the owner’s name by selecting the ‘Only Update Address Fields’ option.
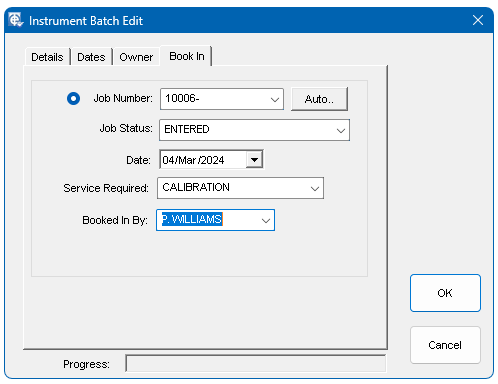
It is also possible to book in multiple instruments under the same job number.
Note: Any blank fields will overwrite existing entries.
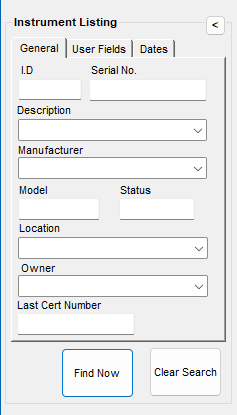
Search
‘Clear Search’will list all the instruments in the database. Alternatively, the displayed list can be refined by the user specifying one or more areas of information about the instrument. Drop down lists are provided to simplify entry – these provide a sub list of all choices available for that field e.g. all the manufacturers found in the current database. In many cases it will be easiest to just enter the instrument I.D. code.
Insert a ‘*’ for the wild card characters, e.g. AV* in the manufacturer’s window will find all instruments with manufacturers’ names starting with AV.
The list of instruments based on the search criteria is then displayed. As the number of instruments in the database increases, it becomes more difficult to locate them. It is possible to sort the order in which they are displayedby clicking on any of the field column headings. The displayed list will sort according to which column heading has been clicked. The sorting order alternates between Ascending and Descending on each click.
Copy
This makes a copy of the instrument selected. The edit window is then shown for new data entry. A new instrument ID will be required.
Cal Now
To calibrate the selected instrument without exiting EasyEdit, click the Cal Now button.
Delete
If deletion is necessary, the instrument is located using the same search method as in Edit Instrument. After selecting the instrument and clicking on delete, a final warning is given before deletion actually occurs. Deleting an instrument does not remove any certificates or procedures associated with the instrument. After deletion, the Identreference becomes available for re-use.
Print List
A full or selective instrument listing can be printed. For example if a list of instruments manufactured by AVO is required select ‘AVO’ from the ‘Find’ window, then click ‘Print List’. If a full instrument listing is required click ‘Find All’ from the ‘Search’ bar, then click ‘Print List’.
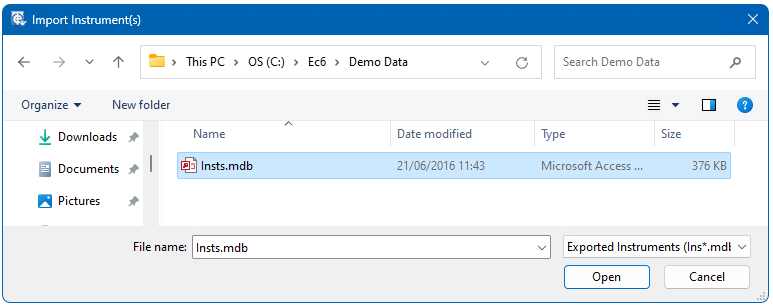
Import
Use this to import data from any EasyCal instrument database. Exported instrument databases are usually prefixed with the letters ‘ins’. Using the ‘Files of type’ drop down menu any possible EasyCal instrument database can be imported, even if it is not prefixed with the letters ‘ins’
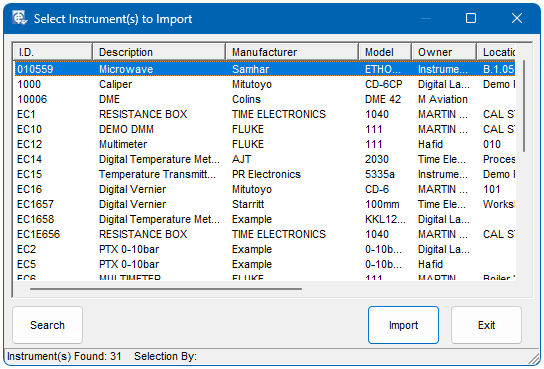
After selecting a database file a confirmation window will appear, click OK to continue. A window will then appear listing the instruments available for import – you may use the search facilities in the same way as they are used elsewhere in EasyCal. Highlight the instruments that you want to import (the ctrl & shift buttons can used to select multiple items). Then click Import to continue. The import will begin.
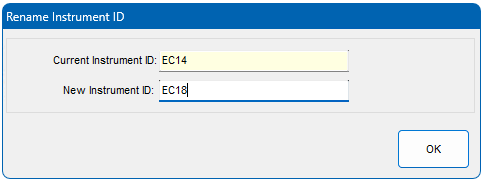
If an Instrument ID already exists the option to update the instrument information is available. Otherwise a new instrument can be created.
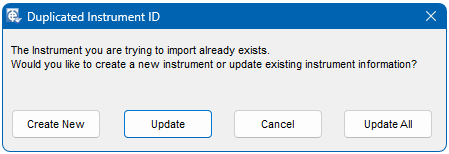
You must change the New ID to a value that is not already in use. At the end of the import, the number of instruments imported, updated and created will be displayed.
Cal Due
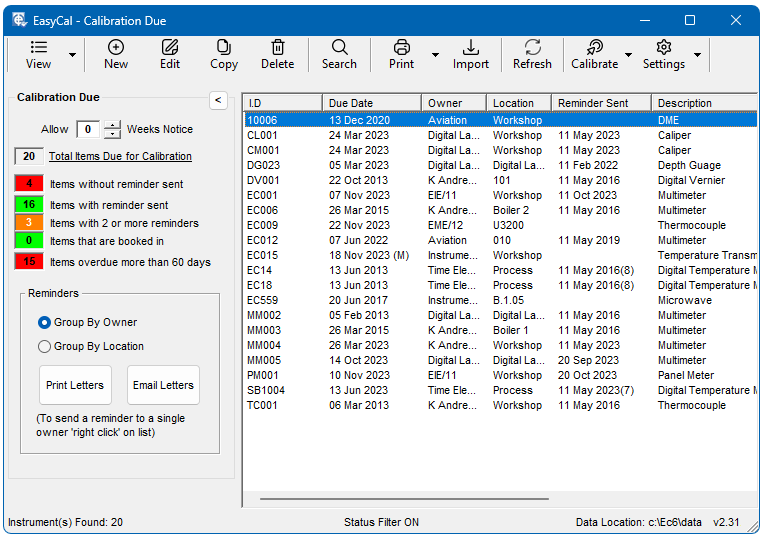
A list is produced showing all the instruments that require calibration. The ‘weeks notice’ feature allows the operator to bring forward the next cal due date by the number of weeks selected. This allows time for shipping etc. The current date, instruments last cal date and cal interval are used to decide if the instrument is due for calibration. If the instrument is ‘booked in’ it will not appear on the list.
Reminder Letters / Email
Reminder letters are produced automatically form the instruments listed. A letter is produced listing all the instruments that require calibration for a particular ‘Owner’ or ‘Location’. If a reminder letter is printed or emailed the ‘reminder sent’ field is automatically updated
When using the email feature, reminder letters are sent as an attachment in PDF format. Only grouping by owner is allowed EasyCal searches the instruments listed for owners to email. Alternatively ‘right click’ on a single instrument to email a reminder to the owner. The owner’s email address is set in ‘Owner Details’.
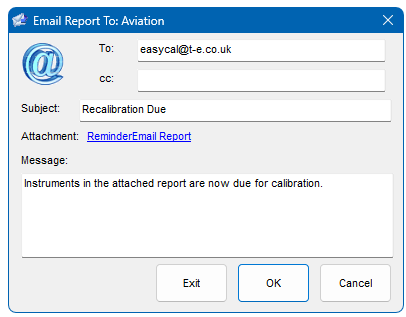
To view the attached letter, click on ‘Reminder Email Report’.
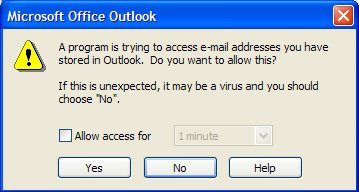
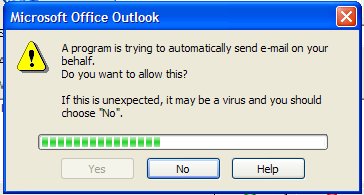
Certain email applications such as Outlook will show a warning, click yes to allow access. The email will then be sent to the ‘outbox’ ready for sending.