File History is a feature of Windows that regularly backs up files from your Libraries, Desktop, Contacts and Favourites to another drive or network location and retains multiple versions over time. These can be viewed and restored whenever required.
Requirements for File History
File History requires a drive or partition separate to the one you’re backing data up from which also has enough space to store a copy of the files along with any future changes. It’s recommended to use a network location or a secondary drive rather than a partition on your main drive to protect against drive failure. For laptop use we would recommend a small USB drive that can remain always plugged in without sticking out enough to get damaged or in the way. We’d recommend having at least 64GB of space and at least a USB 3 interface. Some options are as follows:
- Samsung Fit Plus
- SanDisk Ultra Fit
- Lexar JumpDrive S47
- Integral Fusion USB 3.0
For desktop computer use, USB flash drives can still be used, however where a suitable network location is unavailable, an external hard drive or ideally an external SSD is best for reliability. Mechanical hard drives offer the most space for the price but are more susceptible to drops and shocks than external SSDs and flash drives. External SSDs use higher quality flash storage than USB drives and tend to be much more reliable but come with a higher price point. Some good options for each type are as follows:
USB Drives:
- Samsung Bar Plus
- SanDisk Ultra
External Hard Drive:
- Seagate Portable Drive
- WD Elements Portable
External SSD:
- Samsung T7
- Crucial X9
- SanDisk Extreme Portable External SSD
- ADATA SD600Q
Make sure to regularly check your backups so they’ll work when you need them.
Turning on File History
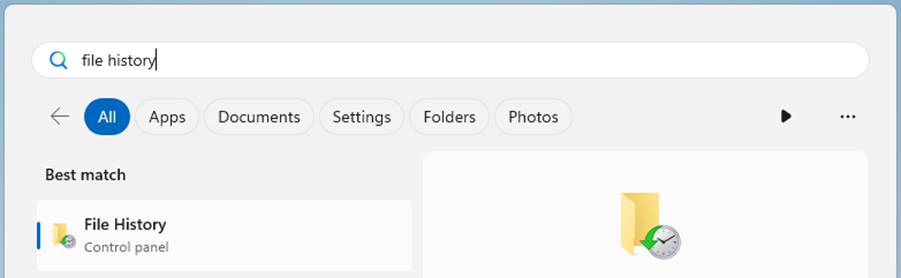
Open the start menu and type ‘File History’ and select the Control Panel option that appears:
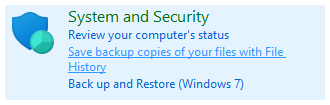
Alternatively, press the Windows and R keys together to open the Run window, type ‘control’ without quotes and press enter. Then select File History from the System and Security section:
File History will altomatically show a suitable drive if one is connected. Refresh the page if you connect one while File History is open. Otherwise, a different drive or a network location can be chosen from the ‘Select drive’ option on the left side.
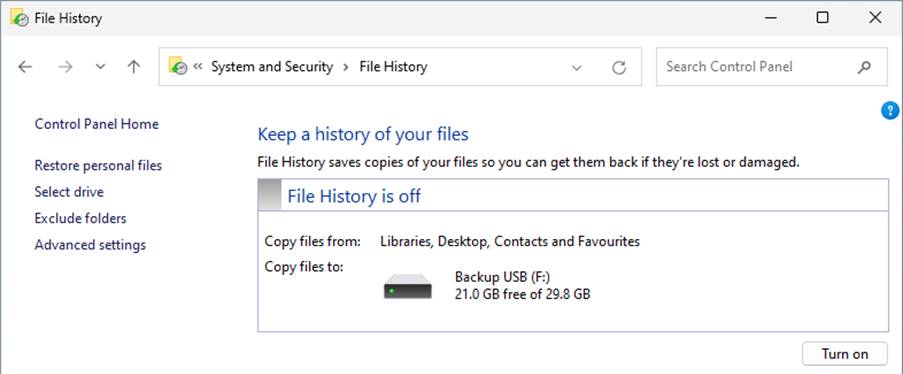
Just click the ‘Turn on’ button and files from your libraries, desktop, contacts and favourites will be copied to a folder called ‘FileHistory’ on the selected drive. By default, files will be backed up hourly and previous backups not deleted. Use ‘Advanced settings’ to configure.
Adding folders
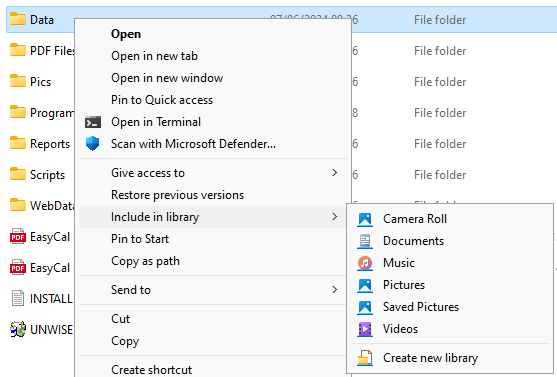
File History doesn’t support individually adding files or folders. However, you can add folders to an existing or new Library and then they will also be backed up. To do so, right click a folder, select ‘Show more options’ then use the ‘Include in library’ option. You may need to restart the system for these changes to take effect and start including the folder in backups. Libraries are hidden by default in Windows 11, to access or manage them, right click on a gap in the navigation pane on the left of a file explorer window and enable ‘Show libraries’.
Restoring files
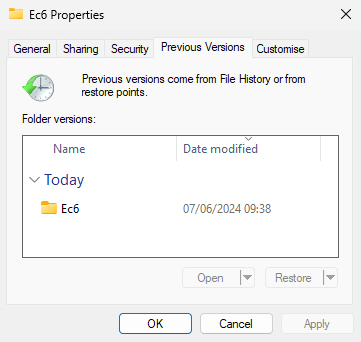
Right click a file or folder, select ‘Show more options’ then ‘Restore previous versions’. You can then select a version and have options to view or restore it.
Note: clicking restore will instantly begin overwriting the files with the backup. You can use the dropdown to restore to another location if desired. You can use the dropdown on the open button to open in File History and selectively restore files.
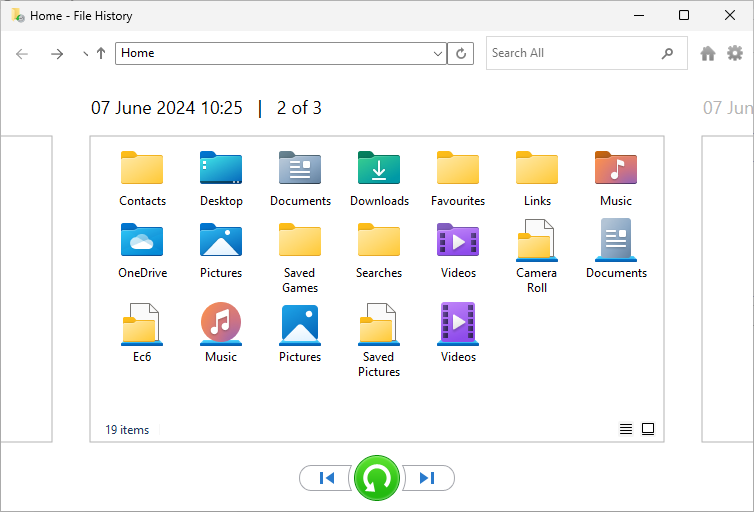
Alternatively, you can also use the ‘Restore personal files’ option on the left of the File History window to browse through backup versions, preview files and then restore the shown files with the buttons at the bottom.