Before starting the actual calibration run, it is necessary to check the details of the instrument and enter further information specific to the calibration about to be done. The following screen appears after the instrument has been selected.
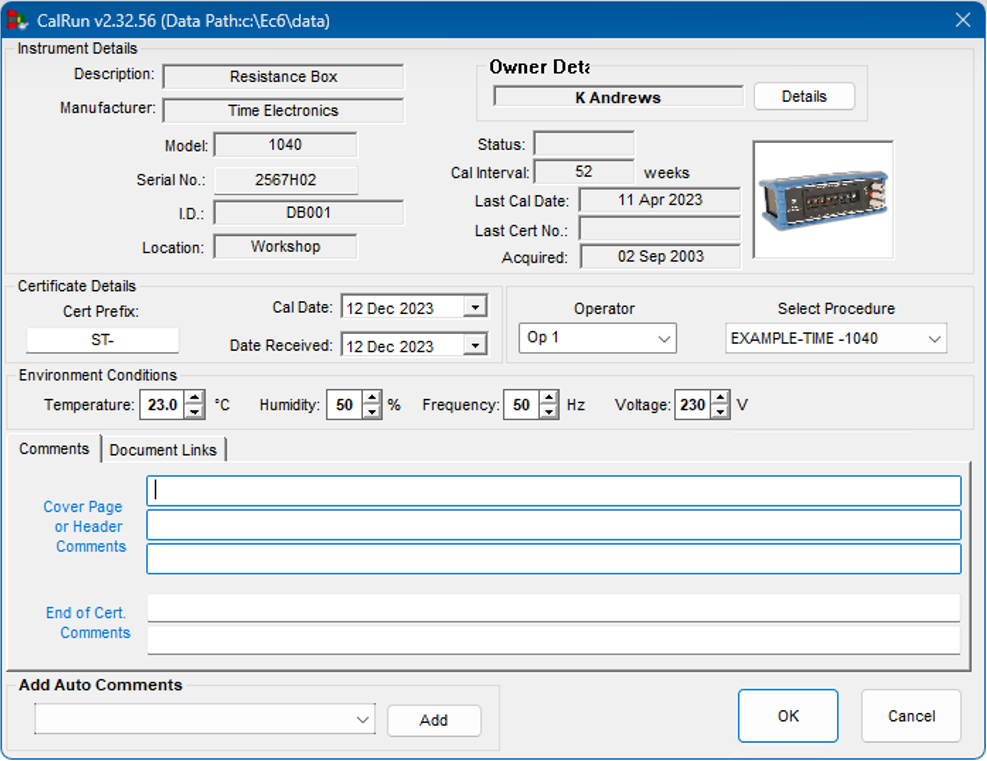
The upper section, under the heading ‘Instrument’, shows the instrument information as stored in EasyCal’s instrument data base. It is not possible to change this information (you must exit and go into EasyEdit to do this).
Check that the instrument information is correct for the instrument you are calibrating – most of this information will be printed on the certificate. The lower section of the window allows the user to input further information which will be saved with the results and also printed on the certificate.
The certificate number is auto generated by EasyCal and starts at 10000, it increments for each new certificate. The user may wish to provide further identification (such as customer code) which can be entered as a prefix to the certificate number. The prefix may be up to 8 alphanumeric characters in length.
Date received
Records the date the instrument arrived in the calibration lab and may be different to the ‘Calibration Date’. Both default to the current date but can be overwritten using EasyCal’s standard drop down calendar entry system.
Operator
Allows the person undertaking the calibration to be specified. The drop down list will show those authorised to undertake calibrations. These people are specified in System Setup (in EasyEdit) under ‘Authorised Operators’.
Select Procedure
Allows the user to specify which procedure to use from a drop down list.
In most cases only one procedure will be available, but up to 12 can be specified (under ‘Instruments’ in EasyEdit). There may be occasions when the same instrument requires calibration to different standards – e.g. a monthly abbreviated short calibration and the full annual calibration.
Comments
These comments are printed on the certificate and can be used for a variety of purposes eg details of any special tests or the mechanical state of the instrument. 3 lines will appear on the cover sheet or header section of the certificate, 2 will appear at the end of the certificate. Default cover page / header comments can be entered in EasyCal > Procedures > Procedure Details.
Using auto comments phrases which are commonly used can be preset and entered by clicking on the phrase. These are set in EasyEdit > System Setup > Options > Advanced Program Options > CalRun.
Document Links
Any document links which have been specified in the procedure details are shown here. To view a document link ‘double click’ on the required link shown in the list. If a document link has been specified to show automatically at the beginning of a test run it will be displayed before commencing the test run.